Floor Plan Editor
Draw and define your flowerbeds, containers, and other planting areas on your garden floor plan.

Michael Johnson
Founder & Head Gardener
Michael is the founder of Right Plant Right Place and a passionate gardener with several years of experience designing and maintaining gardens.
Expertise
- Garden design
- Plant selection for challenging conditions
- Sustainable gardening practices
- Shade gardening
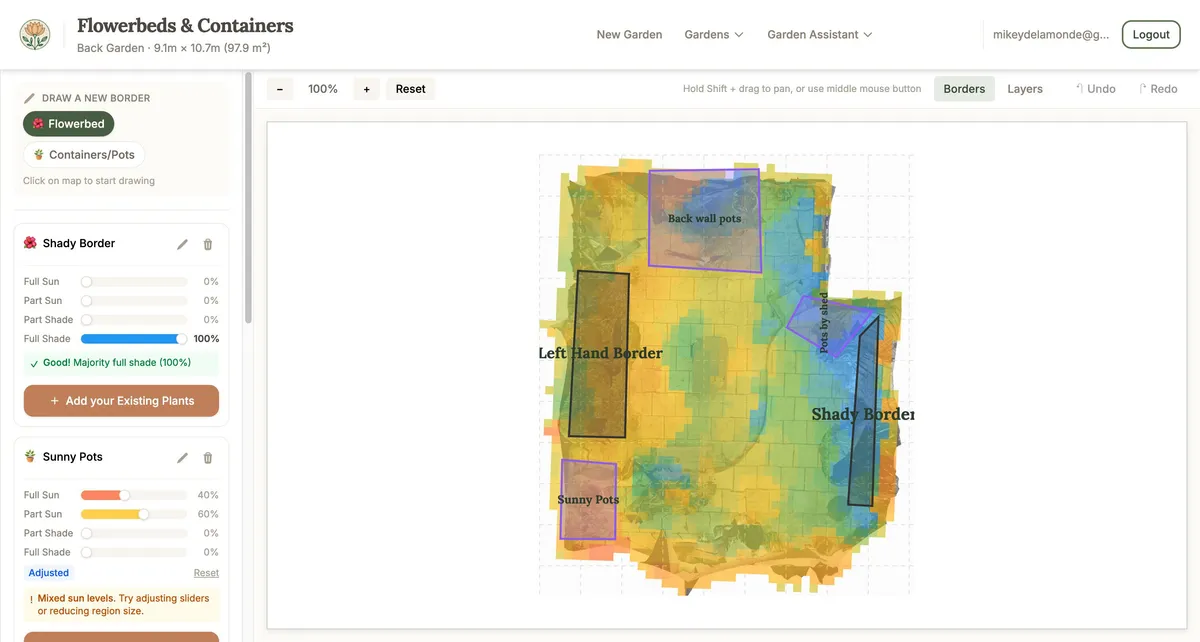
The Floor Plan Editor lets you draw and define different areas of your garden on a 2D top-down view. This is where you mark out your flowerbeds, containers, and other planting areas—the spaces where you’ll eventually add plants.
Accessing the editor: From your garden dashboard, click “Define your Borders & Existing Plants” on a completed garden.
Drawing Garden Regions
Drawing regions is done by clicking points on the canvas to create a shape. It’s easier than it sounds—just trace around the area you want to define.
How to draw a region:
-
Select a region type from the “Draw a new border” section in the right sidebar. Click on “Flowerbed” or “Containers/Pots”.
-
Click on the canvas to place points. Each click adds a point to your shape, and a dashed line shows your progress. You need at least 3 points to create a region.
-
Complete the shape by clicking near the first point to close it automatically. Or click the “Complete” button in the sidebar. Or press Enter on your keyboard.
-
Cancel if needed by clicking “Cancel” in the sidebar or pressing Escape to discard the current drawing.
After creating a region: The region is automatically named based on its sun exposure (for example, “Sunny Border” or “Shaded Bed”). You can rename it by clicking on the name in the regions list. The region’s sun analysis is calculated and displayed automatically.
Region Types
Two region types are available:
| Type | Use For |
|---|---|
| Flowerbed | Borders, beds, planting areas in the ground |
| Containers/Pots | Pots, planters, raised beds, window boxes |
Select the appropriate type before drawing. The type affects how planting recommendations are calculated.
Editing and Deleting Regions
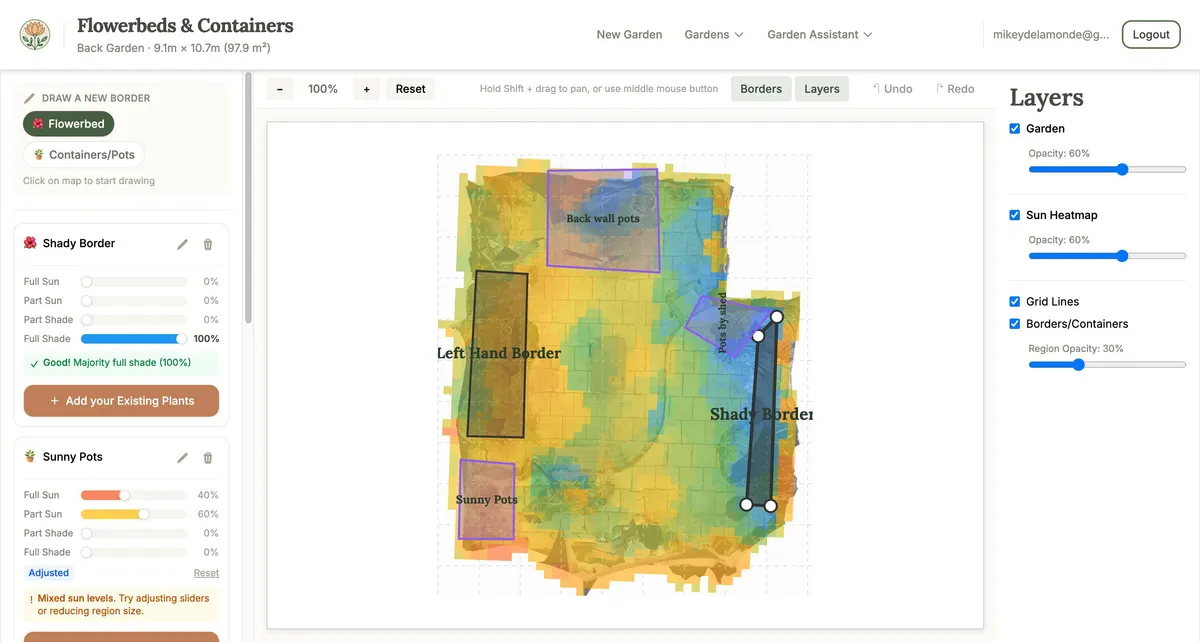
Selecting a region: Click on any region in the canvas to select it for editing. Selected regions show draggable handles at each corner.
Editing a region’s shape:
- Click on the region to select it
- Drag corners to reshape the region
- Add new corners by clicking on an edge between existing points
- Changes are saved automatically
Renaming a region: Click on the region name in the right sidebar, type a new name, and changes save automatically when you click away.
Adjusting sun levels: Each region shows a sun analysis breakdown with sliders for Full Sun (red), Part Sun (yellow), Part Shade (green), and Full Shade (blue). You can adjust these sliders if you know the area receives different sun levels than calculated (for example, from seasonal shading by a deciduous tree). An “Adjusted” badge appears when modified, and you can click “Reset” to restore the calculated values.
Deleting a region:
- Find the region in the right sidebar list
- Click the trash icon
- Confirm the deletion in the dialog
Adding plants to a region: Click “Add your Existing Plants” on any region to go to the plant placement view for that area.
Navigation and View Controls
Zooming:
- Click + or − buttons in the toolbar
- Use Ctrl/Cmd + scroll wheel to zoom
- Use Ctrl/Cmd + = or Ctrl/Cmd + - keyboard shortcuts
- Click “Reset” or press Ctrl/Cmd + 0 to reset the view
Panning:
- Hold Shift and drag with the mouse
- Or use the middle mouse button and drag
- On touch devices: use two fingers to pan
Touch devices: Pinch to zoom, two-finger drag to pan, and single tap to place drawing points.
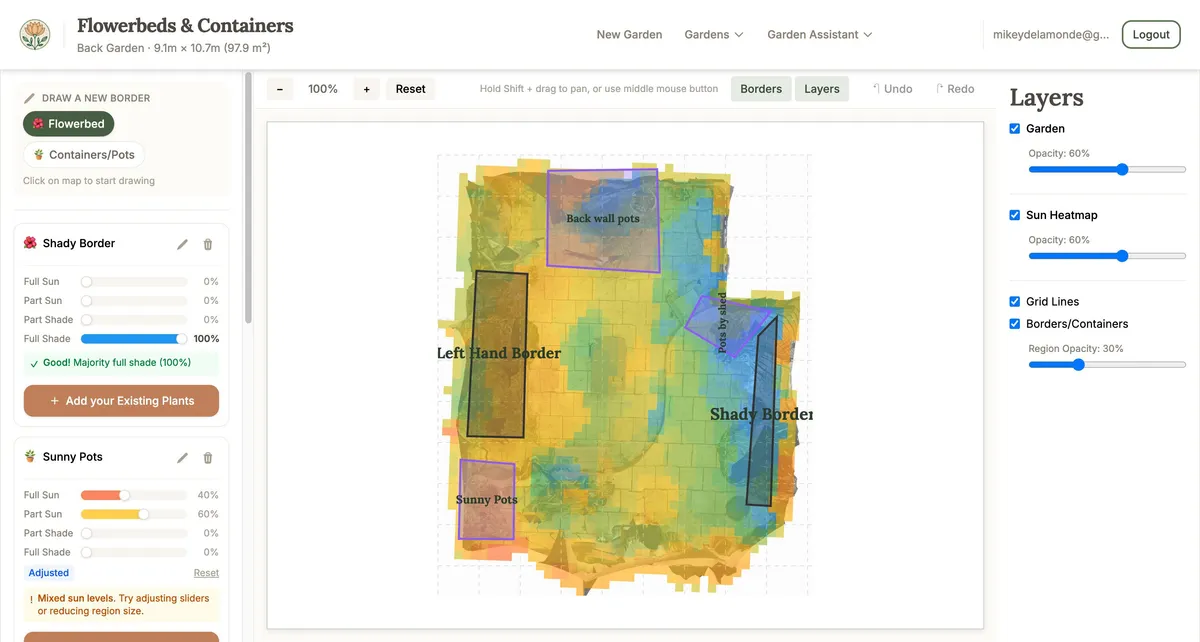
Layers Panel
Click “Layers” in the toolbar to show/hide the layers panel. You can control what’s visible on the canvas:
| Layer | Description |
|---|---|
| Garden | The photographic texture captured from your 3D model |
| Sun Map | The coloured sun exposure overlay |
| Grid Lines | 1-metre reference grid |
| Borders/Containers | Your drawn regions |
Each layer has a checkbox to show/hide it and an opacity slider to adjust transparency (where applicable).
Undo/Redo
Made a mistake? Use undo and redo to step through your changes:
- Undo: Click ”↶ Undo” or press Ctrl/Cmd + Z
- Redo: Click ”↷ Redo” or press Ctrl/Cmd + Y or Ctrl/Cmd + Shift + Z
Undo/redo works for creating regions, moving corners, adding corners, and deleting regions.
Auto-Save
All changes are saved automatically. You’ll see a “Saving…” indicator in the toolbar when changes are being saved. There’s no need to manually save your work—just focus on drawing, and we’ll take care of the rest.
Previous: Garden Calibration Wizard
Next: Plant Identification — Use AI to identify plants from photos and add them to your garden.
Ready to plan your garden?
The Right Plant Right Place app can analyse your specific garden conditions and suggest plants that will thrive in your space.
Get Started Free